|
|
《云的绘画技法》 Painting clouds【翻译:飞天草(Jancks)】
I used Photoshop, but any paint program should work.
我用Photoshop画的,当然用其他的软件道理也是一样的。
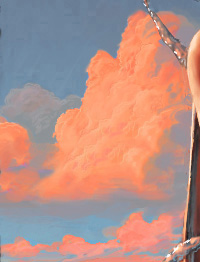 
(Left, cropped from a larger image.)
I start with a ramp like the one on the right; be careful not to use full saturation here.Up to your preference, if you want to make the background a little more purple.
(左图为原图局部放大。)
如右图所示我从一个渐变底色开始,小心不要用饱和度过高的颜色。考虑是否让背景带点紫色倾向这取决于个人偏好。
 
Start painting with max saturation and max value a 'peachy' color on a large default brush (sharp edge, pressure-sensitive opacity).Quickly block in the rough shapes where light would fall on your cloud.
Take special care here (and any time you're painting something in nature) to not be too predictable, symmetrical or regular.
Go down in brush size and do some more detailed strokes.
开始颜色用“桃色”色彩饱和度调到最大,选择默认笔刷(边缘锐利,压感不透明)调大笔刷用大色块铺出基本形状看上去如同光线打在云上。
特别要注意的是(事实上你在任何时候画任何东西的时候)不要想当然地把东西画得太对称、太规律。
接下来笔刷调小一些刻画更多的细节。
 
The shadow color is added, a purple so dull it's almost gray.Then add the darker orange/red color wherever the peach meets the shadow.Also, normally, clouds will be brighter at the top so add it at the base too.
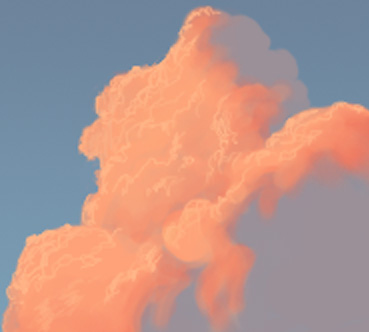 
用近乎灰色的偏紫的颜色画上云的阴影。然后在亮部和暗部交界的地方用橘红色作为明暗过渡。一般按常识来说云朵的上部受到太阳光的照射所以要亮一些。
Now the highlight color, a slightly lighter peach.Use the finest brush and squiggle it on wherever there's a left-hand facing edge of the cloud.Again, don't be predictable and regular.
(The best way is to study reference photos, for example this environment textures site has more than 1000 hi res photos in their "Sky" category.)
现在用稍微亮一些的“桃色”以波浪式蠕动地笔触刻画云彩的高光部分。再提醒一下:注意不要处理得太死板、太概念。(最好的办法是找些照片作为参考,这里推荐一个站点:environment textures site 在这个站点的“sky”分类下面有超过1000 张高清晰度有关云的照片)
We need to soften the right-hand side edges of all these squiggles, while trying to keep the left sides as sharp as possible.You can use a small blur brush, or a smear, or simply paint back the base color into the highlight.
Go back and forth, adding more highlight squiggles, softening some parts, bringing the shadow color in with a finer brush too in some places, etc.
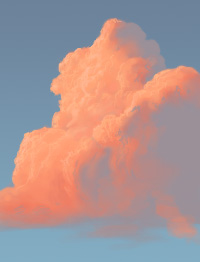
On the right is the finished cloud.
Here's a cloud similar to one I saw today, around noon, near the horizon, through my office window.The light is coming not from the side or above, but about 45 degrees or so.This changes where you need to put the highest values; instead of at the edge of each blob of cloud the highest value ends up pretty much centered.So a different technique will be more efficient.
我们现在将暗部柔化一下,同时尽可能地保持亮部的锐利。可以用小的模糊笔刷也可以用涂抹工具。或者干脆用固有色在亮部反复涂抹,添加更多细节的变化,将次要的部份弱化,用细致的笔触勾画重点部分。等等。。。右边是最终完成的云。
今天中午时分,我在我的办公室窗外看到了地平线上一朵类似的云。光线不是出现在云的顶端或是边沿。而是大约成45度出现。这种变化需要你做相应的改变;每一抹云的边缘(亮度)的最高值非常接近。因此,采用不同的技术将更有效率
 
Use a similar ramp to the above, just a bit lighter.
Create a new layer and paint with a sharp edged brush a value slightly lighter and less saturated than the lightest sky color.Darken it a bit at the bottom.
用相同的皴法处理云的顶部,稍微提亮。
新建一层用硬边笔刷以比最亮部分的天空稍暗、饱和度稍低的色彩来画云的底部。
 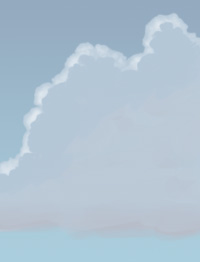
Turn on 'Preserve Transparency' for the layer and paint full white with the airbrush like this.Vary the brush size quite a lot.The goal is to get this kind of 'cauliflower' look.
Then add another layer and paint with a fully opaque sharp edged brush the original cloud color, like on the right.
打开层选项中的“Preserve Transparency(保持透明度)”用喷笔像这样以白色喷涂。画的时候要不断调整笔刷大小目的是得到如图所示如菜花状变化鼓起的形状。然后再新建一层象右图那样使用完全不透明硬边笔刷来刻画云彩的固有色。
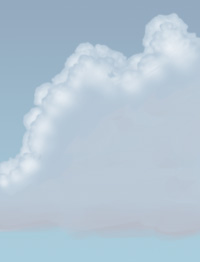 
Same thing again, switch on 'Preserve Transparency' and paint white with the airbrush.
Repeat this cycle until the whole cloud area is filled up.Remember to try to get the edges of each layer a little closer in the beginning, and more widely spaced towards the end (due to the perspective).
同样,再次开启'Preserve Transparency(保持透明度)'用喷笔以白色喷涂,循环重复这个过程直到整个云朵区域都画满为止。记住强调每层云朵之间上部的边缘,而由于透视的原因云朵下部的距离要宽很多。
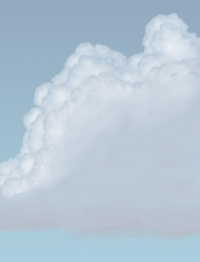 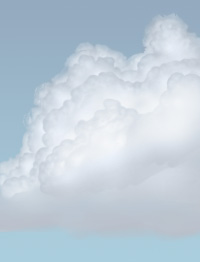
On the right is the finished cloud, note that you can tweak it very easily by using 'Curves' on each layer.I darkened the first layers, also changed the coloring a little.Other tweaks included some added detail on the bottom layer, and airbrushing more white here and there.
Of course instead of the airbrush you could try this with all sharp edged brushes, for a more painterly expressive style.
右图是最终完成后的云,注意你可以很容易地用“曲线”(图像--> 调整 -->曲线)来调整各个层。我将第一层调暗,稍微改变一下颜色。另外也调整了一下云层底部的细节,用喷笔将一些部位喷得更白。当然你也可以尝试用其它的硬边画笔来做这些工作,使画面更富有表现力。(完)- 注:“Preserve Transparency(保持透明度)”在我的PS中文版中没有找到对应的选项,有谁的ps是英文版可以对照一下。我觉得翻译其实是很容易的但想完美表达原作者的本意却是十分困难的事。这是本人第一次翻译英文教程错误在所难免。请批评指正。
- ----- 译者:飞天草(Jancks)
|
|